The Hull Truth
One thing I love about the melonseed is, aside from the flat bottom, the boat is all curves. While I love the look of a lapstrake boat, I wanted the hull to be smoother and more flowing. A smooth hull should enhance the subtle curves that make this boat so visually appealing.This is the major reason I'm going with strip planking. I also wanted a boat that looks good but doesn't require the level of care a traditional wooden boat would. So, I'll fiberglass the hull inside and out, paint the outside, and leave the interior bright.
October 2012
I'm ready to start planking at last. Most folks start at the shear and work back to the bottom. I'll do the same. The first strip is square on one edge with a cove on the other. This puts the cove pointing upwards which makes glue application easier. I'm using Titebond III which has a slightly longer set time then the traditional formula. I found the longer set time helpful when the weather is hot and I'm scrambling to get everything in place before the glue goes off. Also, Titebond III is the most waterproof of the Titebond formulas.
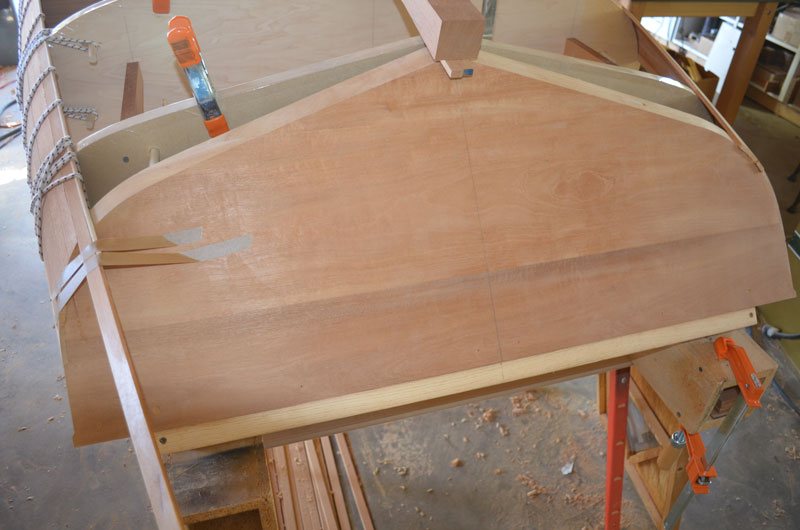
It is a common practice to use staples or brads as temporary clamps until the glue dries. This approach allows for quicker application of the strips but has some drawbacks. Foremost, it creates a vast number of holes that must later be filled and leveled. (a big waste of time) The filled holes will be visible under a bright finish. (ugly!!!) So I decided to keep the holes to a bare minimum. My intentions were complicated by my choice of wood, mahogany is much stiffer and more difficult to bend than ceder. As I've mentioned before, I worked professionally as a cabinet maker, so I have a fairly extensive collection of clamps. This project has taught me you never have enough when it comes to boat building. As I began planking I knew there would be clamping challenges.
One of my other hobbies is guitar making, also known as lutherie. Guitars, like boats, have a lot of curves and therefore present similar challenges during assembly. Over the years I've learned the value of bungee cord in guitar assembly. The nature of bungee makes it very useful for providing clamping pressure in a very controlled way. It is soft and will not damage the wood. At some point it became clear to me I could use bungee cord instead of staples or screws. I acquired some 1/2" poplar dowel rod which I cut into 4" pieces. Then I drilled holes in the stations, inserting the dowel rods through the stations so there is about an 1 1/2" of rod on each side. The dowels are used to secure the bungee cord and will be relocated as needed to provide clamping pressure in the appropriate places.
The first strip establishes the shear line so I decided this would be a good place to use temporary fasteners. I used #8 pan head wood screws for this job. One screw at each station should keep things in place until it's time to glass the hull. I quickly developed a routine for strip application. First, a bead of glue in the cove, not too much, just enough to get a little squeeze out. I start at the stem because this is where most of the twisting occurs and therefore requires the most attention while clamping. I secure the strip at the stem with a spring clamp and work my way to the transom using the bungee cord and other clamps as necessary. I keep a wet rag on hand to wipe away the extra glue. Care must be taken to make sure the strips remain tight to the stations as planking progresses.


On work days I would try to get at least one strip glued on each side. Hopefully more on the weekends. At the end of October I was almost to the halfway mark.

Building the Centerboard
The centerboard for this boat is roughly 18" wide at the pivot end, tapering to around 7", and is 45" in length. The plan calls for 3/4" material covered with glass. I'm using mahogany again, surprise! I created the blank from 18 - 1 1/2" x 46" x 3/4" pieces laminated with marine epoxy. The centerboard will be weighted with about 5 pounds of lead to keep it from floating. I purchased the lead online from Roto Metals. The lead will be melted, poured into a slot in the centerboard, and covered with a wood lid.

November 2012
More strips and more creative clamping.


The bevel on the stem changes as you approach the bottom. Some builders suggest it is a best practice to wait and adjust the bevel as you go, I agree.


No comments:
Post a Comment