My injury occurred just after I started varnishing the interior. Because the deck will limit access to some areas in the bow and stern, my plan was to completely finish the interior first, then add the deck. I chose Epifanes standard gloss varnish as it seems to have a good reputation for durability and UV protection. I read many strong opinions, regarding varnish, at the wooden boat forum. Some folks seem to love the Epifanes product while others hate it. I will say the learning curve is steep with this product.
My experience with varnish is limited, but I've sprayed a lot of nitrocellulose lacquer in my time. Comparatively, varnish is vastly more difficult and labor intensive to apply. The lengthy dry time makes it almost impossible to avoid dust in the finish. Developing good brush skills takes much time and practice. I struggled with getting the viscosity right to eliminate brush strokes and sags. Some folks say a good varnish job is 90% preparation and 10% application. This seems to be true.
I think I spent about three months in varnish "hell". My goal was eight coats and it seemed like I was in some kind of time warp. Minutes to hours, hours to days, days to weeks, weeks to months. Sanding between coats seemed to take forever. I quit logging my hours because it was so depressing. Somewhere along the way I even forgot how many coats I'd applied. I'm still not completely happy with my work, but the interior is at least well protected.
Things I learned about Epifanes varnish.
1. It needs to be thinned between 15% and 25%, using Epifanes brush thinner, depending on temperature and humidity. Just a few degrees difference in temperature seems to make a big difference in how well the product flows. I found adding about 5% retarder, called Epifanes Easy Flow, really helps.
2. You don't need a $40 brush. I started out using an Epifanes brush that was absurdly expensive. The best brush should provide the best results, right? After four coats, frustrated and still unable to get the results I wanted, I tried a nylon brush from home depot. The softer nylon brush left noticeably fewer brush marks and cost only $12.
3. I hate varnish! What a pain in the ass. If I ever build another boat, I'll be looking for a more modern, user friendly alternative. The Epifanes product does have a gorgeous dark honey color that looks great on mahogany.
The Outer Stem
With the varnishing behind me I've happily moved on to other things. The king plank was left loose for better access while varnishing. Before I glue it in place, I need to install the outer stem as this area will be very difficult to access afterwards. Early on I drilled four holes in the inner stem so it could be held in place while the hull was planked. The same holes will be utilized, using 2 1/2" bronze screws, to position the outer stem while the epoxy cures.
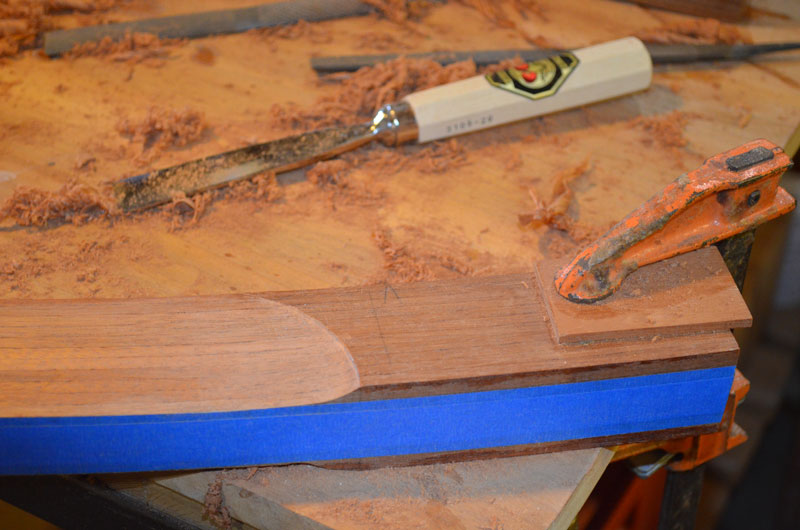
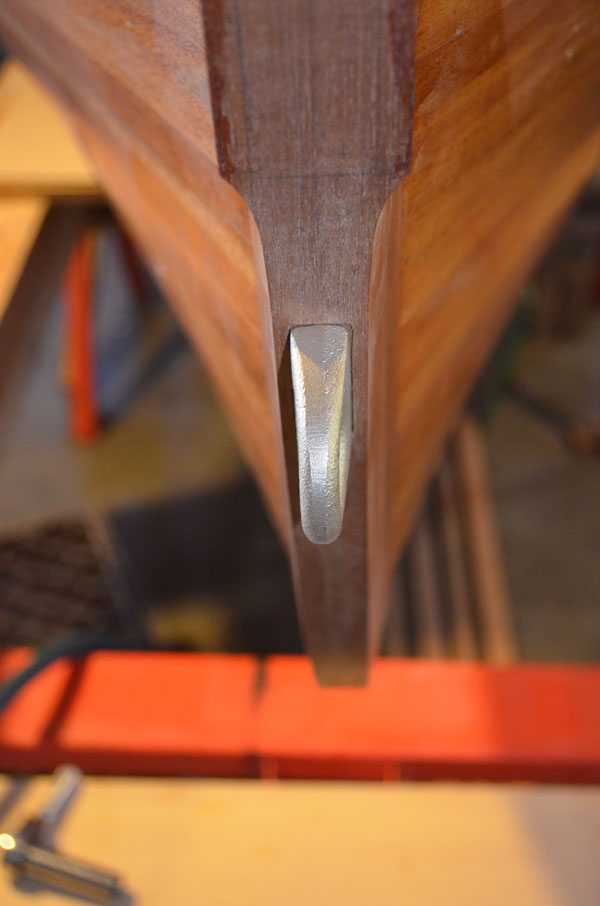
The inner and outer stem were laminated at the same time, using the same jig. I simply put wax paper between the two components. Because of this, there was a minimal amount of fitting to do. The outer stem is run through the planer to match the width of the inner stem including planking. Next, the stem is beveled to the front edge. Brave souls might use a drawknife, but I used a rasp, following up with a hand plane and scraper.
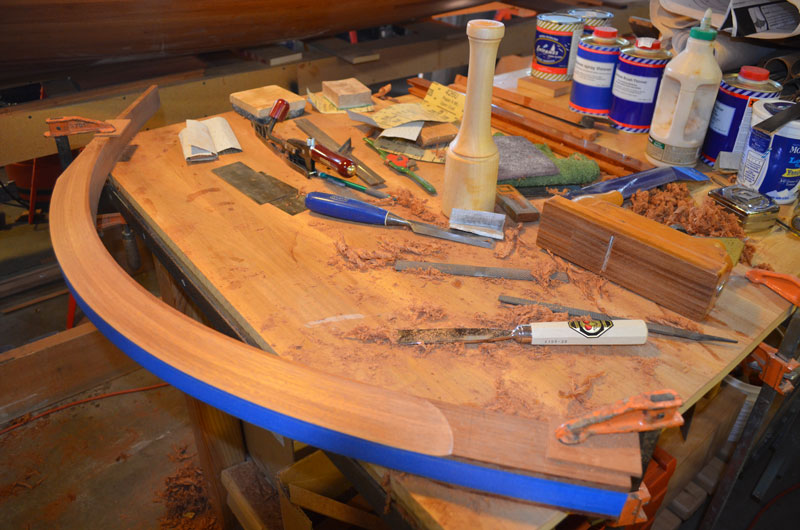
The detail where the bevel ends is accomplished with a sharp spoon gouge.
This is a lot more fun than varnishing .

I found a nice inexpensive bronze bow eye with a 3/8" x 4" stem at Hamilton Marine.

On to the deck...